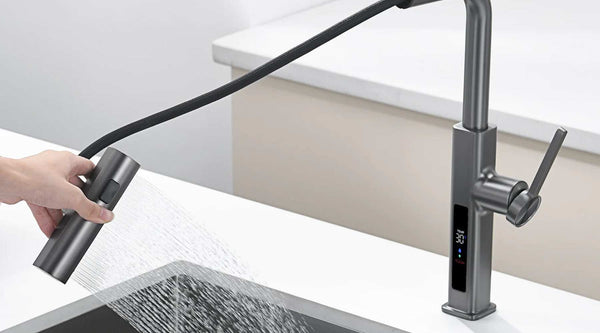
How to Clean Your Kitchen Faucet Head?
Are you tired of gazing at your modern stainless steel kitchen faucet and seeing grimy buildup staring back at you? Fear not, because we've got you covered! At LEFTON, we understand the importance of maintaining a sparkling clean kitchen, and that starts with your faucet. In this comprehensive guide, we'll walk you through the steps to achieve faucet perfection, ensuring your kitchen shines like never before!
Why It's Important to Clean Your Faucets?
Before diving into the nitty-gritty of faucet cleaning, let's address the elephant in the room: why bother? Well, my friend, the answer is simple yet crucial. Over time, faucets accumulate dirt, mineral deposits, and bacteria, which not only tarnish their appearance but also compromise your family's health. Regular cleaning not only preserves the aesthetics of your kitchen but also ensures the safety of your loved ones. So, roll up your sleeves and let's get scrubbing!

How to Clean a Kitchen Faucet Head?
- Materials You'll Need
- Vinegar
- Quart plastic bag
- Rubber band
- Toothbrush
- Baking soda
To kick off your faucet cleaning extravaganza, gather your arsenal of cleaning supplies. Vinegar and baking soda will be your dynamic duo in banishing grime and restoring your faucet's former glory.
Expert Tip: When it comes to faucet cleaning, vinegar is your best friend, but remember to be gentle with sensitive finishes!
Now, let's dive into the step-by-step process:
- Fill 'Er Up: Mix equal parts water and vinegar in a plastic bag, ensuring there's enough liquid to fully submerge the faucet head.
- Bag It Up: Slip the liquid-filled bag over the faucet head and secure it tightly with a rubber band. Let it bask in the vinegar-infused glory for 30 minutes to an hour.
- Scrub-a-Dub: After the designated soaking time, remove the bag and scrub away any loosened debris with a trusty toothbrush.
- Final Flourish: Rinse the faucet with hot water and wipe it down with a mild neutral pH cleaner. For those hard-to-reach crevices, enlist the help of your toothbrush for a thorough clean.
Related: How to Clean and Maintain Your Bathroom Faucet?
How to Remove Hard Water Stains and Deposits
- Materials You'll Need
- Powdered citric acid
- Towel
- Pliers
- Toothbrush
- Vinegar
Are stubborn hard water stains raining on your faucet parade? Fear not, for we have the perfect solution—citric acid! But heed this warning: proceed with caution, as not all faucets are created equal.
Expert Advice: When battling hard water stains, a little citric acid goes a long way. But remember, safety first!
Let's dive into the stain-busting action:
- Citrus Sensation: Dissolve citric acid in boiling water and fill a plastic bag with the solution. If bagging isn't your style, feel free to spray the mixture directly onto the affected areas.
- Soak and Scrub:Let the citric acid concoction work its magic for 30 minutes, then unleash your inner scrubbing warrior. For stubborn stains, a toothbrush will be your trusty sidekick
- Aerator TLC:If your faucet's water flow resembles a sluggish turtle, it's time to show the aerator some love. Unscrew it (gently!) with pliers, soak it in vinegar, and scrub away any buildup with a toothbrush.
- Rinse and Repeat: Rinse the aerator under water, reattach it to the faucet, and revel in your newfound faucet brilliance.
How to Clean Kitchen Faucet Handles
- Materials You'll Need
- A mild pH-neutral cleaner
- Microfiber towel
- Toothbrush
Ah, the often-neglected faucet handles—let's not forget about them! Regular cleaning not only keeps germs at bay but also maintains the overall aesthetic appeal of your kitchen.
Top Tip: Don't overlook the handles! Regular cleaning ensures they stay as shiny as a new penny.
Here's how to show those handles some love:
- Spray and Sit: Spritz the handles with a mild pH-neutral cleaner and let them marinate for a few minutes.
- Scrub-a-Dub-Dub: Grab your trusty toothbrush and give those handles a thorough scrubbing. Pay extra attention to the nooks and crannies where grime loves to hide.
- Shine Bright: Wipe down the handles with a microfiber towel, leaving them gleaming like stars in the night sky.
- Extra Oomph: For those stubborn water stains, whip up a citric acid and water solution and give the handles a final spritz.

Conclusion
And there you have it, folks! With our expert tips and tricks, you'll have your kitchen faucet looking brand-spanking-new in no time. So, bid farewell to grime and hello to gleaming faucets that would make even the most discerning houseguests swoon. Happy cleaning!


Leave a comment